DungeonMaker Guide
Introduction
The DungeonMaker feature allows regular players to build areas that they can use for storytelling purposes. These areas don't necessarily need to be dungeons - naming them so is merely a fun convention based off D&D. An area could be an ancient family farm that your character wants to recover from bandits, or a cave where there's rumored to be treasure, or an old maze guarded by riddling monsters.
Please note:
- These areas will be joined to the game world upon the discretion of reviewing staff, and this review may take a variable amount of time depending on the area: how easily it fits into the game world, how large it is, how much writing there is to parse, if special functionality is requested in the comment, and so on.
- Staff are liable to change things about the areas, especially if the player has built the area to help along their own character's story. We want the world to feel dynamic and exciting, rather than predictable.
- Areas should be thematic, well-written, and make sense -- or they likely won't be accepted.
- Once the area is joined to the game world, anyone may access it. It is not the property of the building player, although they are free to build any number of puzzling or hidden paths to attempt to obscure the area's existence.
- If there's a functionality that you want to have in your area but the feature doesn't provide for it, include an explanation in the dungeon comments and staff may or may not add that functionality for you manually. (For example, you build a cow mob, but really want it to be a minotaur.)
- Much about this feature is liable to change as Song of Avaria continues development. As always, if you have suggestions or criticisms or ideas, post on the forums!
- The DungeonMaker tool is unfortunately rather sight-dependent, but we've included alternate text as much as we know how, and we would sincerely welcome input about how to improve the feature for visually-impaired users.
- Dungeon building is accessible only from the website, not through an in-game connection.
How to Use the DungeonMaker
Starting Your Dungeon
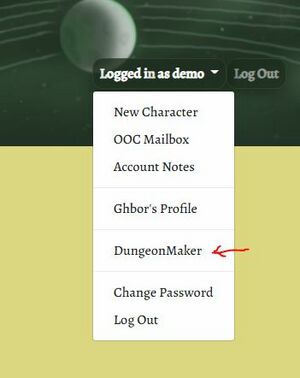
Your list of areas in progress (dungeons) can be found under your account drop-down menu when you're logged into the Song of Avaria website.
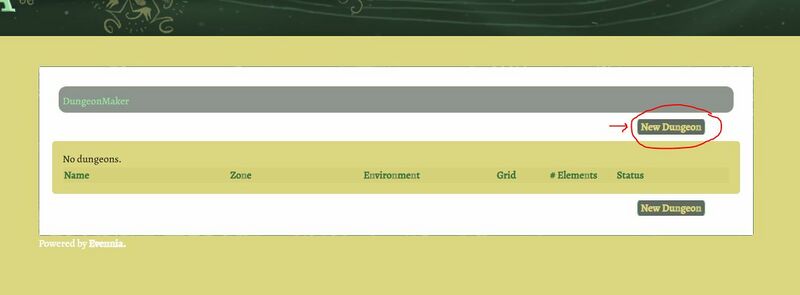
Once you click that link, you will see a list of dungeons, if you have started any, and buttons that you can use to start building a new one.
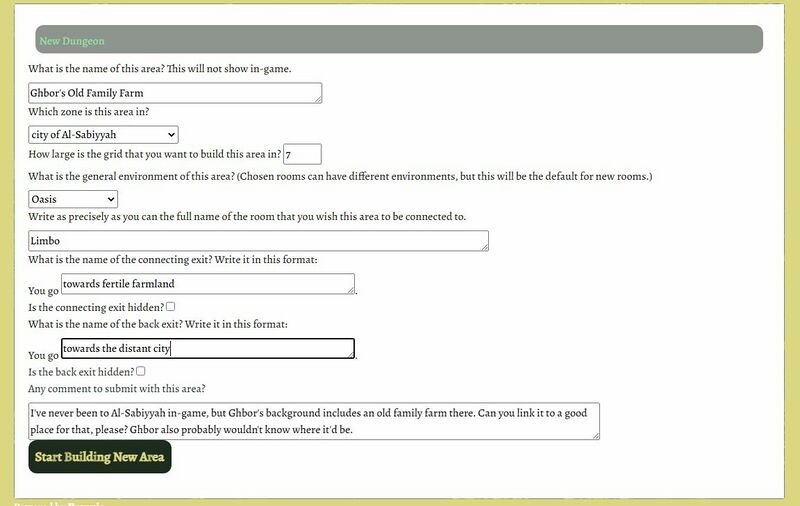
Starting a new dungeon requires you to make some initial decisions, namely:
- How large is this place? It is recommended to choose the smallest grid size possible, so that you won't have to see a lot of extra space while designing.
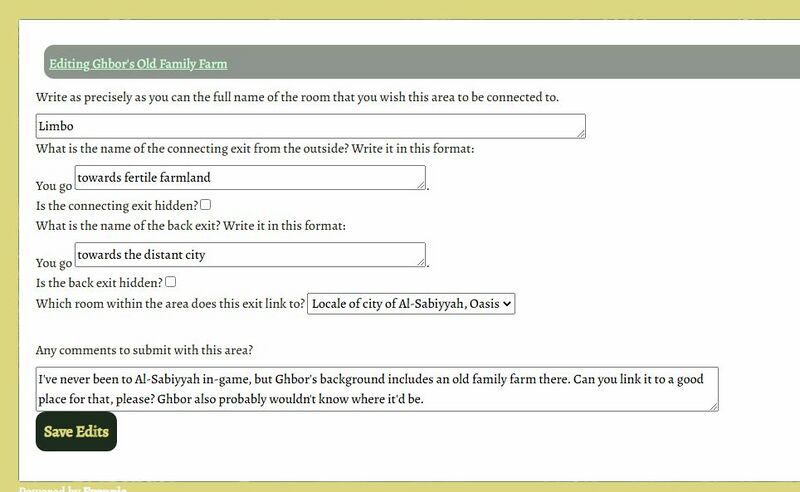
- Where is it? Most of these decisions have to do with planned location. What does the entrance to the dungeon look like? What about the way back out of it? You should already know the name of the room that you want to join the dungeon to. If you are not sure about that, however, simply leave it as "Limbo" and include a note in the comment.
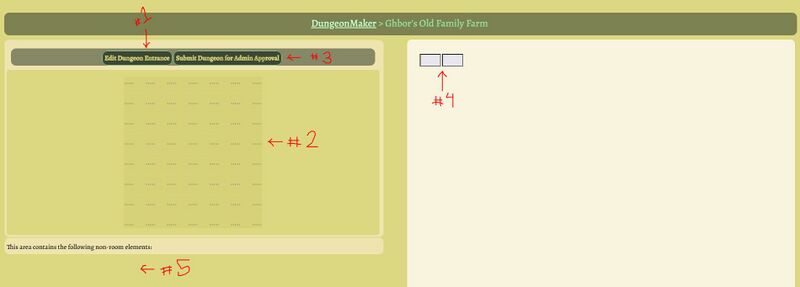
Once you have finished initial setup, you will be brought to the dungeon editing page. There you will see the following parts, numbered and discussed in more detail below:
#1:Dungeon Entrance
You can edit the connecting exit from your initial setup here, as well as change the comment. The interior connecting room will default to the first room built in the area, but you can change that here too.
#2:Grid Layout
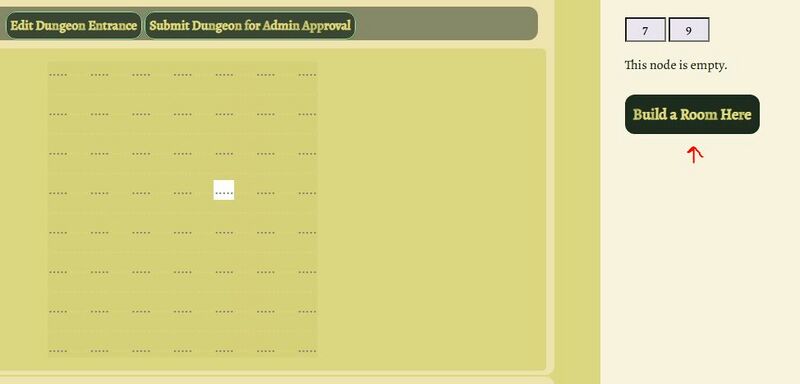
A grid of the size that you requested in initial setup. You can click on nodes in the grid to build rooms there.
#3:Submission Button
When you are finished building, use this button to submit your dungeon. After submitting, you will not be able to edit it anymore. If it is rejected, it will be returned to you.
#4:Node Selection
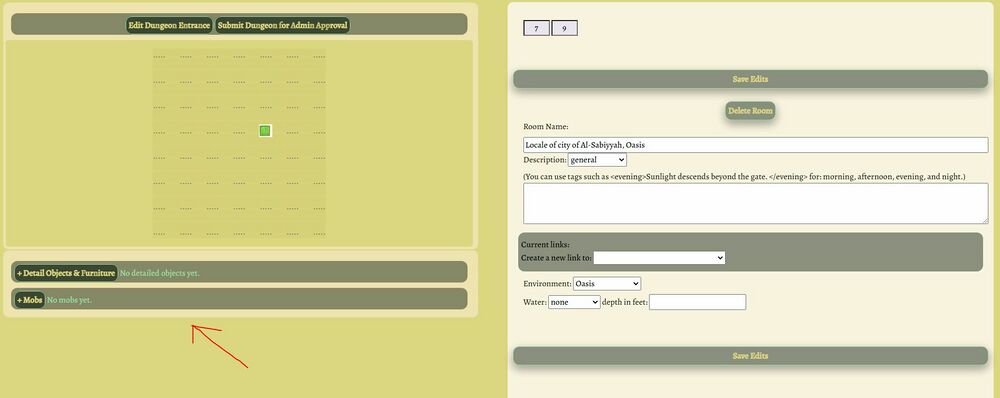
Once you select a node from the grid, its coordinates will show up here. If the node is empty, you will be able to build a room. Otherwise, you will be able to edit the location on the grid. This is also where you will be able to add mobs or objects in the room.
#5:Room Elements
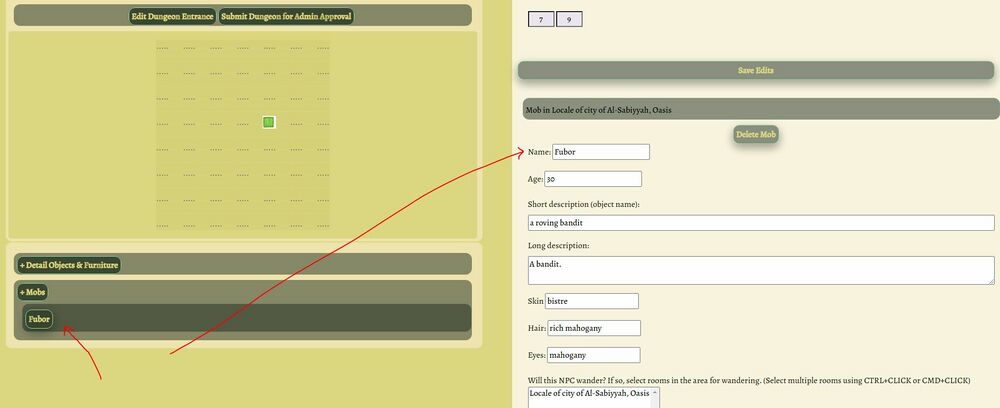
If you have mobs or room detail objects in your area, they will show up here. You can click on them to edit their details.
And that's the basic guide! Feel free to ask on the forums if you have any specific questions.
